Best Star Tracker for Astrophotography
The best star tracker for most beginners is the iOptron SkyGuider Pro at $359, a lightweight camera mount that turns a fifteen second untracked exposure into a two to four minute tracked one, roughly sixteen times the light per frame, without the weight or cost of a full telescope mount.
A camera on a fixed tripod is limited to a few seconds of exposure before the sky's own rotation trails the stars into short streaks. A star tracker solves exactly that problem and nothing else: it turns in sync with the sky at sidereal rate, so a lens pointed at the Milky Way can expose for minutes instead of seconds. The best choice for most people starting out is the iOptron SkyGuider Pro, a purpose built camera tracker that costs a fraction of a full telescope mount and needs no telescope at all to be worth owning.
What does a star tracker actually buy you?
A commonly quoted untracked limit for a wide angle lens on a modern high resolution sensor is around 15 seconds before star trailing becomes visible. A tracker turns that same shot into a 2 to 4 minute exposure, which is 8x to 16x the light gathered in a single frame. That extra headroom does two things: it lets faint detail in the Milky Way and nebulosity actually register above the sensor's noise floor, and it lets you drop ISO by roughly two stops for the same overall exposure, which visibly reduces noise in the final image compared to a short, high-ISO untracked shot of the same scene.
What is the NPF rule, and how do you use it?
The NPF rule estimates the longest untracked exposure before star trailing becomes visible: 35 times the f-number, plus 30 times the pixel pitch in microns, divided by focal length, divided again by the cosine of the target's declination. It replaced the older "500 rule" because modern sensors resolve trailing at exposure lengths the older rule called safe. For a lens at f/2.8 on a sensor with a 4.3 micron pixel pitch, aimed near the celestial equator where declination is close to zero and cosine is close to 1, the numerator works out to roughly 227. Divide that by your focal length to get the untracked limit in seconds.
Declination matters because stars near the celestial pole appear to move more slowly across the sky than stars near the celestial equator, so a target near the pole tolerates a longer untracked exposure at the same focal length. The rule accounts for that with the cosine term: cosine of declination shrinks toward zero near the pole, which divides the numerator by a smaller number and lengthens the allowed exposure.
At what focal length does untracked imaging stop being viable?
Around 100mm of focal length, untracked deep sky imaging effectively stops working. At f/2.8 with a 4.3 micron pixel pitch, the NPF limit at 100mm works out to roughly 2.3 seconds, too short to gather meaningful signal on anything beyond the brightest, widest nightscapes. The table below shows how quickly that ceiling drops as focal length climbs, and how much light a tracker recovers at each length.
| Focal length | Untracked limit (NPF) | Tracked exposure | Light gain |
|---|---|---|---|
| 24mm | 9.5s | 120s | 12.6x |
| 50mm | 4.5s | 120s | 26.7x |
| 85mm | 2.7s | 120s | 44.4x |
| 135mm | 1.7s | 120s | 70.6x |
| 200mm | 1.1s | 120s | 109.1x |
Figures assume f/2.8, a 4.3 micron pixel pitch and a target near the celestial equator, and use our NPF rule exposure calculator to check your own camera and lens. A target near the celestial pole tolerates a longer untracked exposure than these numbers show. See our exposure time by focal length chart for a broader reference table.
Which star tracker should you actually buy, by budget?
Present these as a ladder rather than a single winner, because the right one depends on whether a camera and lens or a full telescope is riding on top of it.
Star trackers and imaging mounts by budget

iOptron SkyGuider Pro Camera Mount
A star tracker, not a telescope mount: it carries a camera and lens and turns the sky at sidereal rate so a two minute exposure has round stars. This is the correct first purchase for wide field Milky Way imaging and it costs a fraction of a real equatorial.
Best for: Camera and lens astrophotography before any telescope
Check price
Sky-Watcher Star Adventurer GTi Mount Head Kit
A full GoTo equatorial in a package light enough to travel with, carrying a small ED refractor and a camera comfortably. It is the point where a star tracker becomes a real mount, and it will autoguide, which a plain tracker will not.
Best for: A first telescope plus camera imaging rig
Check price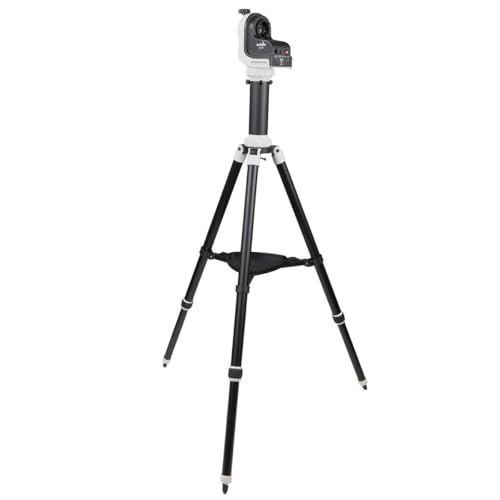
Sky-Watcher AZ-GTi Computerized Alt-Az Mount
GoTo and tracking from a phone in a head that weighs under 4 lb, and it can be flashed to equatorial firmware for short exposure imaging. Eleven pounds of payload is the real limit and it is not generous, so match it to a small refractor rather than an 8 inch tube.
Best for: A small refractor or Maksutov you carry outside every clear night
Check price
Celestron Advanced VX Computerized Equatorial Mount
Thirty pounds of rated payload, which by the imaging rule of thumb means roughly 15 lb of actual telescope and camera. This is the entry point for long exposure deep sky work with a real telescope rather than a lens.
Best for: An 8 inch SCT or a 6 inch Newtonian used for imaging
Check pricePrices change often, confirm on Amazon. As an Amazon Associate we earn from qualifying purchases.
The iOptron SkyGuider Pro is a tracker, not a telescope mount: it is built to carry a camera and lens, not an optical tube, and it costs a fraction of a real equatorial mount. The Sky-Watcher Star Adventurer GTi is the point where a tracker becomes a real mount, light enough to travel with but capable of carrying a small refractor and autoguiding, which a plain tracker cannot do. The Sky-Watcher AZ-GTi can be flashed to equatorial firmware for short exposure imaging and doubles as a full GoTo alt-azimuth mount for visual use, which makes it a genuinely flexible middle choice. At the top, the Celestron Advanced VX is a full German equatorial rated for 30 lb visually, built for a real telescope and camera train rather than a camera and lens alone.
Who should not buy the expert tier?
Anyone shooting only with a camera and a lens should not buy the Advanced VX as a first star tracker. It is a full German equatorial mount with a heavy steel tripod and a counterweight set, all sized for the load of a telescope, a guide scope and a camera train. Hauling that weight out to the yard for a camera body and a 50mm lens is a poor trade against a tracker built specifically for that lighter job, and the Advanced VX also demands a more careful polar alignment routine than a compact tracker does. It earns its place on this list only once a telescope, not just a camera, joins the payload.
What comes with a star tracker, and what do you still need to buy?
A tracker like the SkyGuider Pro ships with the tracking head itself, a polar scope or polar alignment tool for aligning it with the celestial pole, and a ball head or camera mounting plate. It does not include a tripod, a camera or a lens; most buyers already own a photography tripod sturdy enough to carry a tracker, and any camera with manual exposure control paired with a wide to short telephoto lens is a workable starting kit. A remote shutter release or the camera's own intervalometer function is worth having as well, since imaging sessions typically shoot dozens of frames in sequence rather than one exposure at a time.
How do you polar align a star tracker in the field?
Every tracker on this page needs its rotation axis pointed at the celestial pole to track accurately, which in the northern hemisphere means aiming it close to Polaris. Compact trackers use a small polar scope built into the housing, sighting Polaris directly through a reticle; heavier mounts such as the Star Adventurer GTi and Advanced VX can also polar align electronically through their control app, which is slower to learn but more precise once practiced. A rough polar alignment, done by eye with a compass and a polar scope, is accurate enough for exposures up to a few minutes at the focal lengths this page covers; longer exposures or longer lenses reward the extra few minutes spent on a more careful alignment.
What should your first tracked imaging session actually target?
Start wide. A 24mm to 50mm lens pointed at the Milky Way core or a bright constellation forgives small polar alignment error and small tracking imperfection far more than a telephoto lens does, because the same angular tracking error covers a smaller fraction of a wide frame than a tight one. Our how to start astrophotography guide walks through a first tracked session start to finish, and our best telescope for astrophotography guide covers the next step once a telescope, rather than a lens, becomes the goal.
How many frames should a first tracked session capture?
Plan for volume rather than a single perfect exposure. A typical first tracked deep sky session aims for somewhere between twenty and sixty individual sub-exposures at the two to four minute length a tracker enables, which stacking software later combines into one final image with far less noise than any single sub could show on its own. More subs generally beat longer individual subs once you are already tracking well, because a handful of ruined frames from a gust of wind or a passing cloud costs you far less of the total session when the session is sixty short subs rather than six long ones. Set an intervalometer or the camera's built-in interval timer once framing and focus are locked, and let it run rather than babysitting the shutter button all night.
What is the difference between a star tracker and an autoguided mount, precisely?
A star tracker like the SkyGuider Pro runs open loop: it turns at a fixed sidereal rate and trusts that rate to stay accurate for the length of the session, with no feedback about whether it is actually tracking a specific star correctly. An autoguided mount, such as the Star Adventurer GTi or Advanced VX running with a separate guide camera and guide scope, runs closed loop: it watches a chosen guide star continuously and makes small real time corrections to cancel out periodic error and polar alignment drift as they happen. Open loop tracking is genuinely sufficient for the two to four minute exposures this page focuses on with a well done polar alignment; autoguiding becomes worth the extra equipment and setup time once exposures stretch past five minutes or a telescope's longer focal length starts to reveal drift a plain tracker cannot correct.
Do you need a dedicated astronomy camera, or does a regular camera work?
Any camera with a fully manual exposure mode, an interchangeable or otherwise adjustable lens, and the ability to shoot RAW files works on a star tracker; this includes most mirrorless and DSLR bodies already sitting in a household camera bag. A dedicated cooled astronomy camera, of the kind that pairs with the telescopes on our astrophotography telescope guide, becomes worth adding once a telescope replaces the camera lens, because it is built specifically to minimize thermal noise over the longer integration times deep sky imaging through a telescope demands. For wide field tracked shots with a lens, skip the dedicated camera purchase entirely and start with equipment already on hand.
Related reading
- Best telescope mount, for a telescope rather than a camera and lens
- Best telescope for astrophotography, the next step up from tracked wide field
- NPF rule exposure calculator, check your own camera and lens
- Exposure time by focal length, a quick reference chart
- How to start astrophotography, the full beginner workflow
We review it on its own too, in full detail: the Star Adventurer GTi.
Frequently asked questions
What is the best star tracker for beginners?
The iOptron SkyGuider Pro at $359. It carries a camera and lens, turning at sidereal rate so a multi-minute exposure produces round stars instead of trailed ones. It is the standard first purchase for wide field Milky Way and nightscape imaging, and it costs a fraction of what a full telescope mount runs.
What does a star tracker actually buy you over a fixed tripod?
A fixed tripod limits a wide angle exposure to around fifteen seconds before stars visibly trail. A tracker turns that same shot into a two to four minute exposure, roughly eight to sixteen times the light gathered in a single frame, and lets you drop ISO by about two stops for the same overall brightness, which cuts visible noise substantially in the final image.
What is the NPF rule?
A formula for the longest untracked exposure before star trailing becomes visible: 35 times the f-number, plus 30 times the pixel pitch in microns, divided by focal length times the cosine of declination. It replaces the older, less accurate 500 rule and accounts for how modern high resolution sensors reveal trailing sooner than older, lower resolution ones did.
At what focal length does untracked deep sky imaging stop working?
Around 100mm. Using the NPF rule at f/2.8 with a typical 4.3 micron pixel pitch, the untracked limit at 100mm works out to roughly two seconds, which is too short to gather meaningful signal on a faint target. Below that focal length, untracked wide field shots of bright nightscapes and the Milky Way remain genuinely workable; above it, a tracker stops being optional.
Do I need a full telescope mount instead of a star tracker?
Not for camera and lens imaging. A tracker like the SkyGuider Pro is lighter, cheaper and simpler to polar align than a full equatorial mount, and it is the correct tool as long as a camera and lens, not a telescope, is riding on it. Move to a full mount such as the Star Adventurer GTi once a telescope and guide camera join the payload.
Who should not buy the Advanced VX as a first star tracker?
Anyone shooting only with a camera and a lens. The Advanced VX is a full German equatorial with a heavy tripod and counterweight set sized for a telescope, and hauling that weight out for a camera body and a 50mm lens is a poor trade against a light tracker built for exactly that job. It earns its place only once a telescope and autoguiding join the setup.
How we choose: we compare published manufacturer specifications, optical figures we can verify, and reviews from owners who have used the equipment under real skies. We do not test gear in person. Never point any telescope, finder or binocular at the Sun without a certified full-aperture solar filter fitted over the front of the instrument.
Recording your own eyepieces, exit pupils and sessions? The Observing & Astrophotography Planner is the paid version of these pages: 8 printable worksheets you fill in with your own numbers, plus the full PDF, $29.